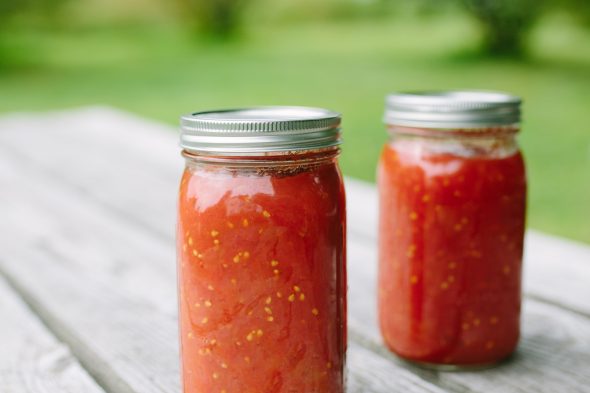
Canned tomatoes in five easy steps
Food Lovers
Food Lovers
Fall is fast approaching, and we like to preserve a taste of summer by canning our tomatoes. Canned crushed tomatoes will make a great base for a variety of dishes all winter long. Here is our advice for delicious, canned tomatoes in five easy steps.
Yields about 7 one-pint jars
7 lb of tomatoes
Fresh basil leaves (1 per jar or more, to taste, optional)
Salt (to taste, optional)
Lemon juice or citric acid (¼ tsp of citric acid, ½ tsp of fresh lemon juice or 1 tbsp of bottled lemon juice per one-pint jar)
The first step to make good canning is the choice of tomatoes. A tomato that has few seeds and little juice will yield better results as it will maintain a firm texture throughout the canning process. Amongst our varieties, we particularly recommend The Rebelle.
We also advise letting the tomatoes mature a few days, between 2 and 4 on average, so that they lose in acidity which will in turn produce better canning with a richer flavour. You can simply spread them out on a flat surface, either on newspapers or a clean sheet.

This step consists in sterilizing the jars. For the lids, place the disks and rings in a small pot, cover with cold water, and bring to a simmer. Turn off the heat and let rest in hot – not boiling – water to activate the rubber bands that will eventually seal the jars.
For the glass jars, place them in a large pot and cover with water; the jars should be completely submerged so ensure there’s at least ½ an inch of water above the necks. Heat the pot on medium heat until the water simmers, reduce the heat and leave the jars to rest in the hot water while you proceed with the next steps.
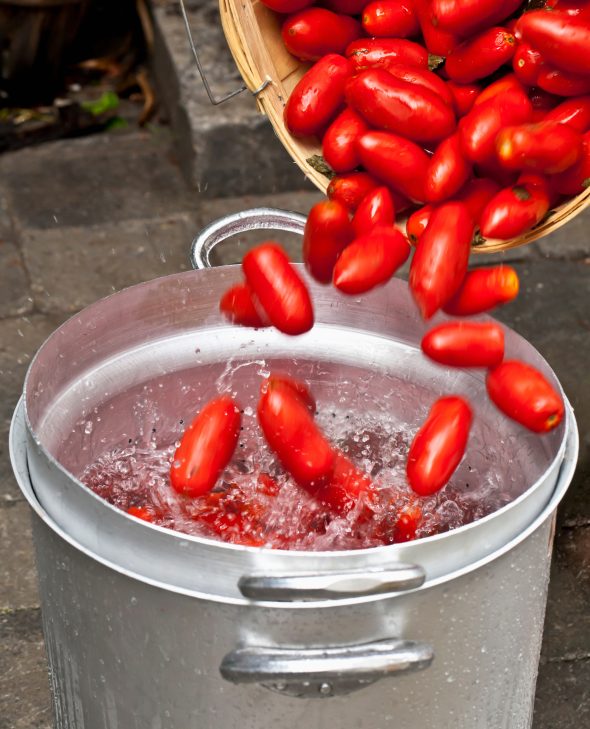
For this step, bring a pot of water to a boil and prepare a large bowl that you’ll fill with ice cold water. Keep a smaller pot underhand for the tomato skins and seeds which you can later use for another recipe or simply compost. Remove the stems before blanching the tomatoes.
Plunge a few tomatoes at a time in the boiling water for about 30 seconds, then remove them with a slotted ladle. Dip them in the iced water to cool them, then remove the skins and cores with your fingers or with a little spoon. Crush the tomatoes in chunks with your hands and save them in a bowl.
Repeat this step until all your tomatoes have been blanched.
The role of the citric acid is crucial: even though tomatoes are acidic, their pH is not sufficiently low to kill all bacteria that might develop in your cans and make them unfit for consumption. By adding citric acid (as a concentrate, or naturally contained in fresh or bottled lemon juice), you can lower the pH in the jars enough to protect them from bacteria.
Remove your jars from the hot water and fill them with the required amount of citric acid (or lemon juice). Add ½ a teaspoon of salt to taste (optional). Use a wide mouth funnel to fill the jars with your crushed tomatoes. Keep about ½ an inch (1 cm) of space at the top of the jars so they can properly seal. You can add some fresh basil leaves to taste (one or more per jar, optional). Do not hesitate to press your tomatoes to liberate their juice. It’s also very important at this stage to remove all air bubbles by using a non-metallic utensil – for example, a clean wooden chopstick – and stirring the mixture in the jars.
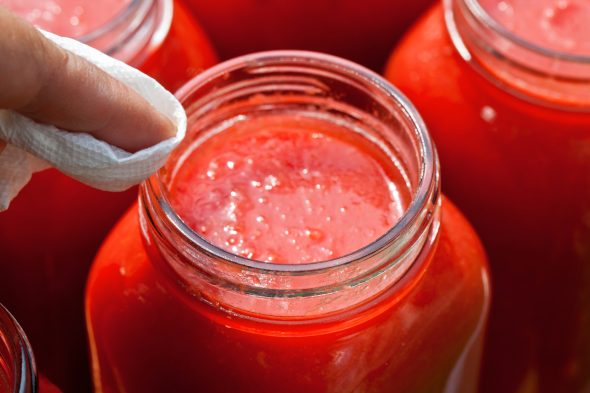
This is the most important step of the whole canning process. Begin by wiping the jar necks and sides with a clean, slightly damp cloth. Gently place the sterilized disks on the jars, aligning the rubber bands so they adhere to the jar necks. Take the metallic rings and tighten them on until you feel resistance, without forcing.
Place the pots at the bottom of a very large pot and cover with water. The jars should be submerged, so calculate at least 1 inch of water above the lids. Bring the water to a boil and boil for 40 to 75 minutes. Remove the jars from the pot and delicately place them on a clean rag so they can cool. We recommend you move the jars as little as possible at that stage; you can let them rest overnight. The lids should produce an audible “pop!”.
The last step consists in checking if the jars have sealed properly. To do this, you can simply press down at the centre of the lids. If you can press down the disk, the can has not sealed properly and you should refrigerate it immediately and use it without delay. You can also reboil cans that did not seal well for 20 to 25 minutes to complete the process. Let them rest and cool. Once you hear the “pop!” sound, the cans are ready to be stored!
Enjoy!